

How To Repair Philips Sonicare
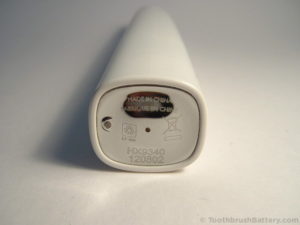
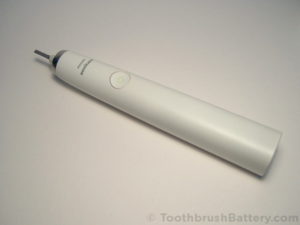
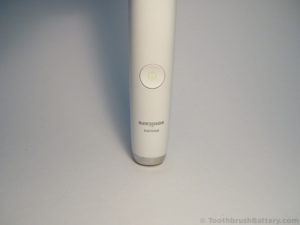
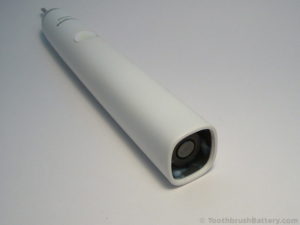
This guide will take you step by step through how to dismantle the Philips Sonicare DiamondClean HX9340 electric toothbrush and replace the internal rechargeable battery. The tutorial is based on the white HX9340 model simply is applicable to other HX9300 serial models including the black, purple and pink versions such as the HX9330, HX9350, HX9360, HX9370 and similar. The model number of your Sonicare toothbrush is marked on the bottom of the handle.
For other toothbrush models the bombardment replacement procedure is slightly different and then please see our other guides to toothbrush bombardment replacement instead.
The basic method is:
- Open and dismantle handle
- De-solder old battery
- Supersede battery
- Solder in new battery
- Reassemble handle
This is documented in detail beneath along with lots of pictures. Click on whatever picture to enlarge information technology.
Disclaimer
Any damage to yourself, your toothbrush or anything else is entirely your responsibility. This guide is for professional, educational purposes only and is offered without guarantee or liability.
Warning: Lithium-ion batteries are volatile and if shorted or overheated they volition go into thermal delinquent and ignite creating a severe burn hazard. Practise non short-circuit, disassemble, crush or expose contents to water. Lithium reacts violently in water like Sodium and Potassium did in those science experiments at school!
Video
We have also created a curt video on our YouTube aqueduct from this guide to Philips Sonicare DiamondClean bombardment replacement, which you can also spotter below.
Tools / Parts / Equipment
- Philips Sonicare DiamondClean Electrical Toothbrush
- Compatible charger
- Soldering atomic number 26: Electronics course (well-nigh 18-25 watt) with chisel tip
- Solder: Lead-gratis silver solder is nifty for this
- Solder sucker (also known every bit a desoldering pump) and/or desoldering braid
- Adaptable grips
- Pocket-size flat-bladed screwdriver: 2 to 4mm broad
- Miniature side-cutters
- Duct record
- Corrugated cardboard
- Replacement battery: 49mm by 14mm 3.7V Lithium-ion (Li-ion) with wire pins. Support united states of america by buying from us hither at ToothbrushBattery.com.
How-To
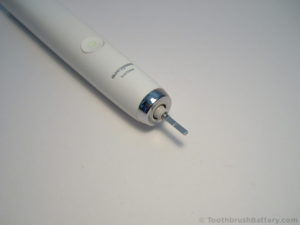
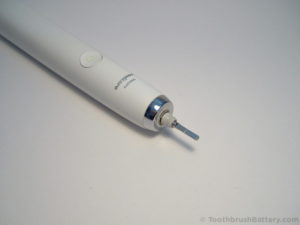
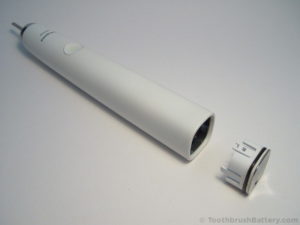
To commencement with, remove any brush heads from the acme of the handle. To soften up the plastic of the handle yous can stand the toothbrush in a loving cup of hot tap water (about threescore degrees C or 140 degrees F) for five minutes before starting. This should brand opening it upwards easier as the internal clips should flex more than easily.
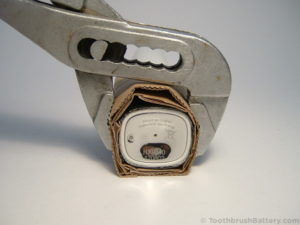
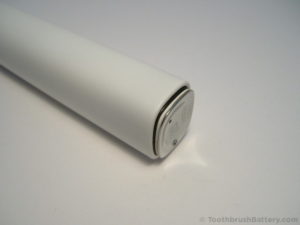
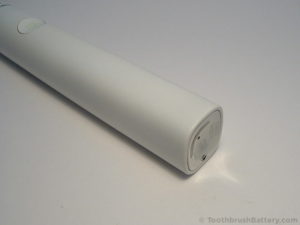
Tear off a strip of duct tape nigh 15cm (6 inches) long and stick it around the circumference of the handle right at the lesser, upwardly to the border.
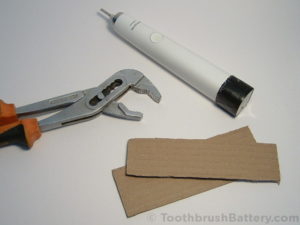
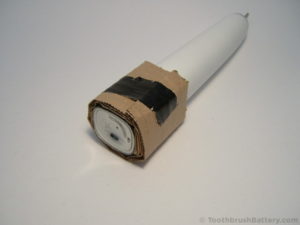
Cut 2 pieces of cardboard the aforementioned length and width every bit the duct tape and wrap both over the top of the duct record. Gear up them in identify with another slice of tape. Together the cardboard and tape will protect the toothbrush handle from damage by the grips.
Identify the grips right upwards to the bottom edge of the handle and squeeze the handle firmly across the widest part of the base.
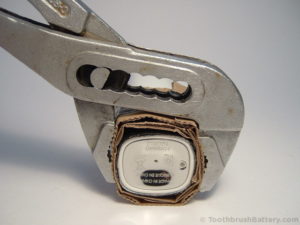
Release the grips, rotate the handle a quarter of a plough then squeeze the grips again.
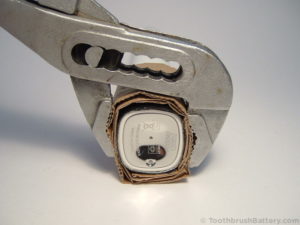
Keep releasing the grips, rotating the brush past a quarter of a plow and and so squeezing with the grips until the base cap pops out a few millimetres. You can then lever the cap out with the screwdriver.

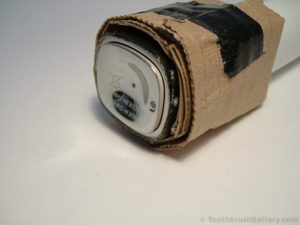
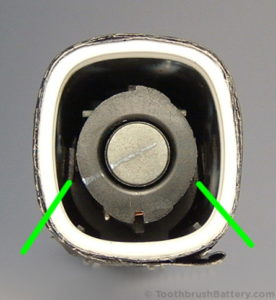
There are ii black plastic tabs holding the workings of the toothbrush in identify by engaging on the inner wall of the handle casing. These tabs can exist released by poking down inside the casing using the small screwdriver and moving them away from the inner wall of the handle casing (arrowed beneath). Besides see beneath the sneak preview of the dismantled toothbrush with a plastic tab arrowed and so you can see what you're releasing. You can slide the screwdriver in only above the blackness plastic block to release the clip.

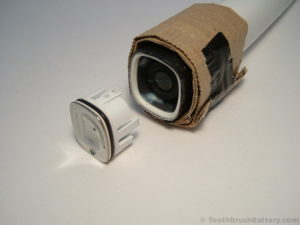
Push the handle down hard, shaft first, onto a solid surface. This might marking the surface so use a flake of wood or something outdoors! The inner workings of the brush should kickoff to slide out.
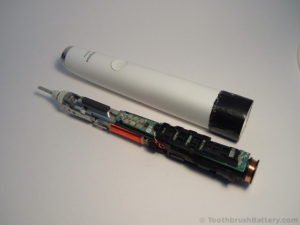
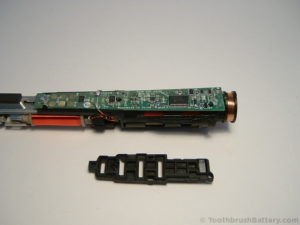
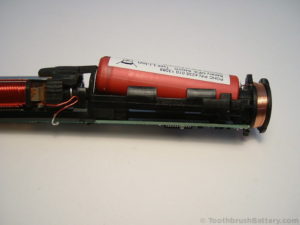
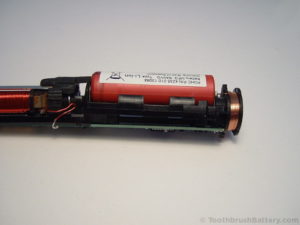
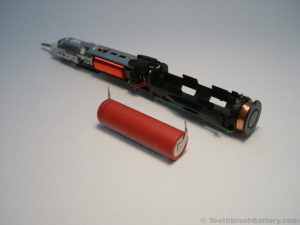
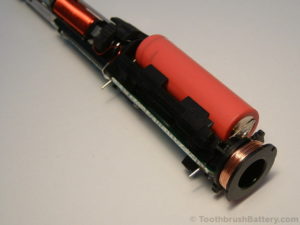
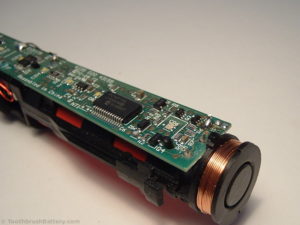
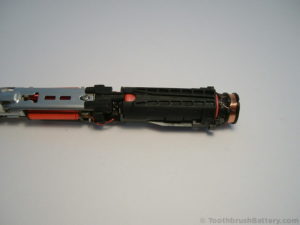
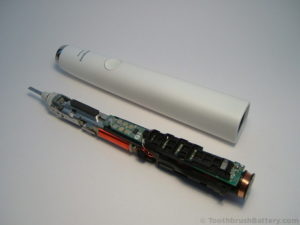
Fully slide out the innards of the toothbrush.
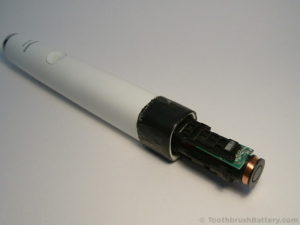
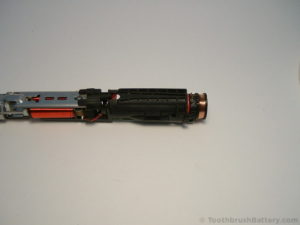
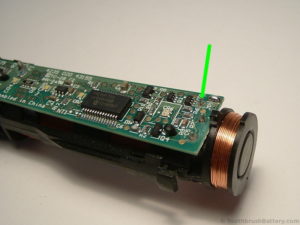
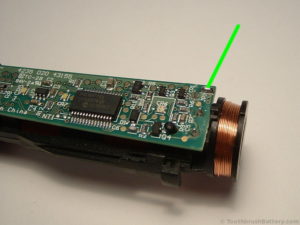
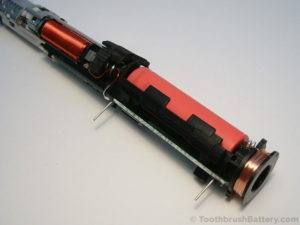
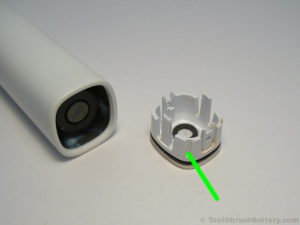
Remove the protective black safety spacers from both sides. First the excursion lath side:
Then the battery side.
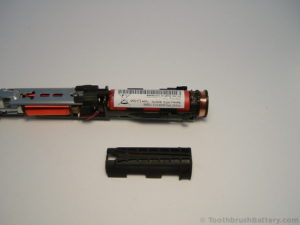
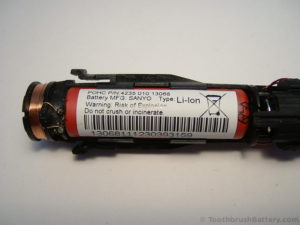
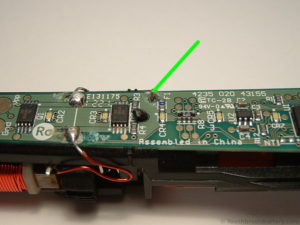
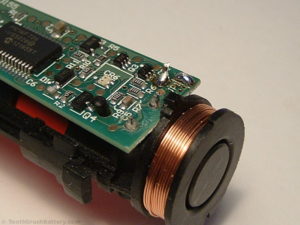
You tin come across the original bombardment in-situ. This DiamondClean is fitted with a Sanyo battery. The label shows part number POHC P/N 4235 010 13068, Battery Mfg Sanyo and Type Li-Ion on it. Yours might have a different characterization showing a different part number such as POHC P/Northward 4235 010 15362 and/or Battery Mfg Sony but it should withal be a Li-Ion type (Lithium-Ion.) The Sony and Sanyo batteries are interchangeable then you can fit either to your toothbrush. The Sanyo batteries we supply are college chapters so they will run for longer earlier needing to be recharged.
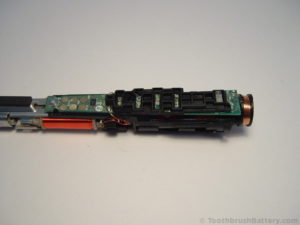
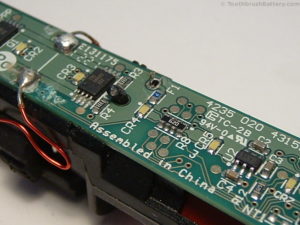
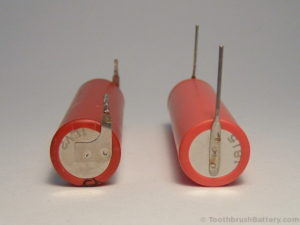
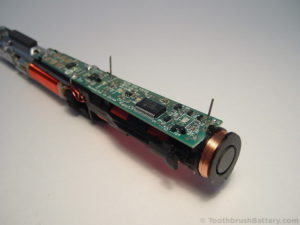
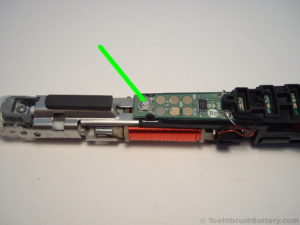
There are three solder points that we're interested in. The positive battery terminal, (arrowed below)
The negative bombardment terminal, (arrowed beneath)
And JP1 which disconnects the battery (arrowed below.) This is very important due to the volatile nature of Lithium-Ion batteries. It besides takes away some risk of shorting out the battery when we remove it.
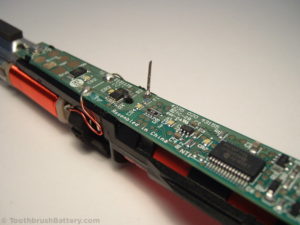
Warm up your soldering fe and using a solder sucker, complect or just by carefully moving the solder blob break the join between the two pads of JP1.
Using the solder sucker or braid, de-solder the positive battery terminal so that the metal pin can be moved inside its hole. You might find that y'all need to simultaneously pry the bombardment out slightly at that end while the solder is molten to make certain the solder doesn't solidify back onto the solder tag.
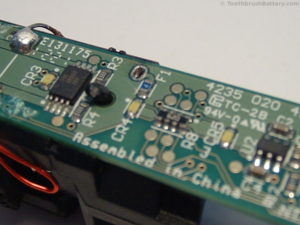
In the same fashion, using the solder sucker or braid, de-solder the negative battery final so that the metallic pin tin can exist moved within its hole. Again, you lot might notice that you demand to simultaneously pry the battery out slightly at that end while the solder is molten.

Remove the old battery from its holder and make clean up the holes in the circuit board to brand sure they are clear of solder, fix for the new battery to exist fitted.
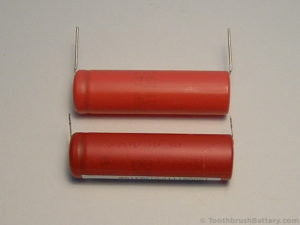
Compare your original battery to its replacement. This is a 49mm long by 14mm diameter three.7V Lithium-Ion bombardment. Also bachelor in greenish! Please support u.s.a. with writing these repair guides by buying your replacement battery through our secure online shop here at ToothbrushBattery.com. Note the groove around the circumference of each battery – this is at the positive end of the bombardment.
Positive terminals:

Negative terminals:
Insert the new battery into its holder with the pins at an angle and then they line up with the holes in the excursion board. Make sure you become the polarity (+/-) right! Remember that the groove around the circumference of the battery is at the positive end.
Push the bombardment right into its holder so the pins get through the circuit board.
Plow the brush over so y'all tin can run into the excursion board.
Making sure that the bombardment is yet firmly in its holder, solder both battery pins in place.

Using miniature side-cutters cutting the pins off just in a higher place the solder joints.
Re-join the two solder pads of JP1.
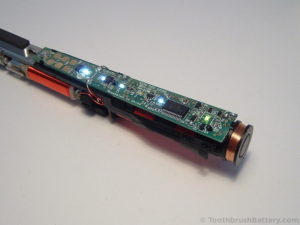
You might find that some of the (very brilliant!) LEDs light upwardly at this stage. You lot can also agree the toothbrush over its charger for ten seconds to verify that it starts to charge up correctly.
Re-fit the protective rubber spacer over the excursion board, ensuring the moulded clips at the sides go over the circuit board.
Re-fit the protective prophylactic spacer over the battery, ensuring the moulded clips interlock with the plastic frame.
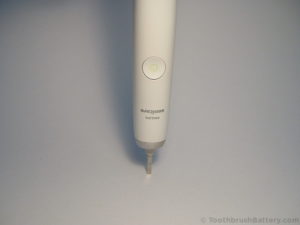
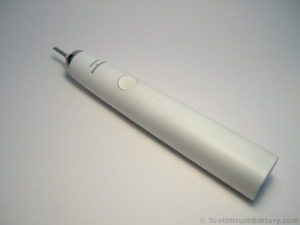
Carefully simply tightly hold the toothbrush around the safe spacers. Yous can now try switching on the toothbrush to test information technology past pressing the ability switch arrowed below. Be enlightened that it will vibrate strongly! Switch information technology off once again after a second or two. The LEDs might stay lit for a while afterwards testing.
If the brush will not switch on go back and bank check your soldering of the bombardment connections, the soldering of JP1 and that the battery was fitted the right way around. Also check that the charging light comes on when the toothbrush held over the charger.
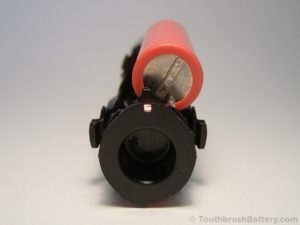
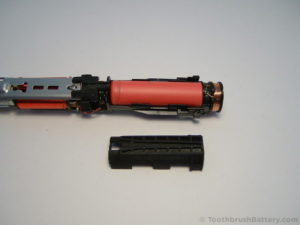
Slide the inner workings back into the handle casing. Make sure the innards are the right fashion upwardly and that they slide in easily forth the alignment splines moulded within the casing. The inner workings should slide all the way in.
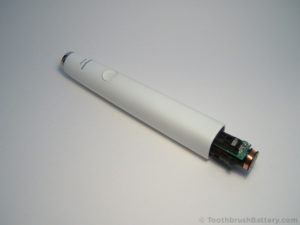
Line upward the tiny grooves in the base cap (see below) with the splines in the casing (they are at the back of the casing) and push button the cap in. It should click into place.
You should now have a fully repaired and reassembled Sonicare DiamondClean toothbrush! Put the brush on to accuse for a full 24 hours and check that the charging light starts to flash. Please recycle your former battery either at a local civic amenity or a supermarket drove betoken.
Delight leave any questions, tips or comments most this battery replacement guide below.

Source: https://toothbrushbattery.com/guides/philips-sonicare-diamondclean-hx9340-battery-replacement/
Posted by: kellyfamenjusich.blogspot.com
0 Response to "How To Repair Philips Sonicare"
Post a Comment